The Mailchimp birthday field lets you collect subscriber birthdays so you can send automated birthday emails every year. In other words, you can capture birthdays through Contact Form 7 and sync them directly to your Mailchimp Audience using Chimpmatic.
Additionally, this guide covers the accepted date formats, how to add a birthday field to your CF7 form, how to map it in Chimpmatic, and how to verify the data appears correctly in Mailchimp.
What Format Does the Mailchimp Birthday Field Accept?
The Mailchimp birthday field is different from a regular date field.
The Mailchimp API accepts two formats for the birthday field. Most importantly, it does not include the year:
- MM/DD — Month/Day (US format)
- DD/MM — Day/Month (international format)
You choose the format when you create or edit the birthday merge field in your Mailchimp Audience settings. In fact, this setting determines how Mailchimp parses the data it receives from your form.

Why No Year?
Mailchimp uses the birthday field for recurring annual automations — specifically, sending a birthday email every year on the same date. As a result, including the year would make it a one-time date field, not a repeating birthday trigger. If you need a full date with year, use a regular date merge field instead.
Step 1: Add a Birthday Field to Your Contact Form 7 Form
In your CF7 form editor, add a date field using the [date] tag. For example, you can set up your form like this:
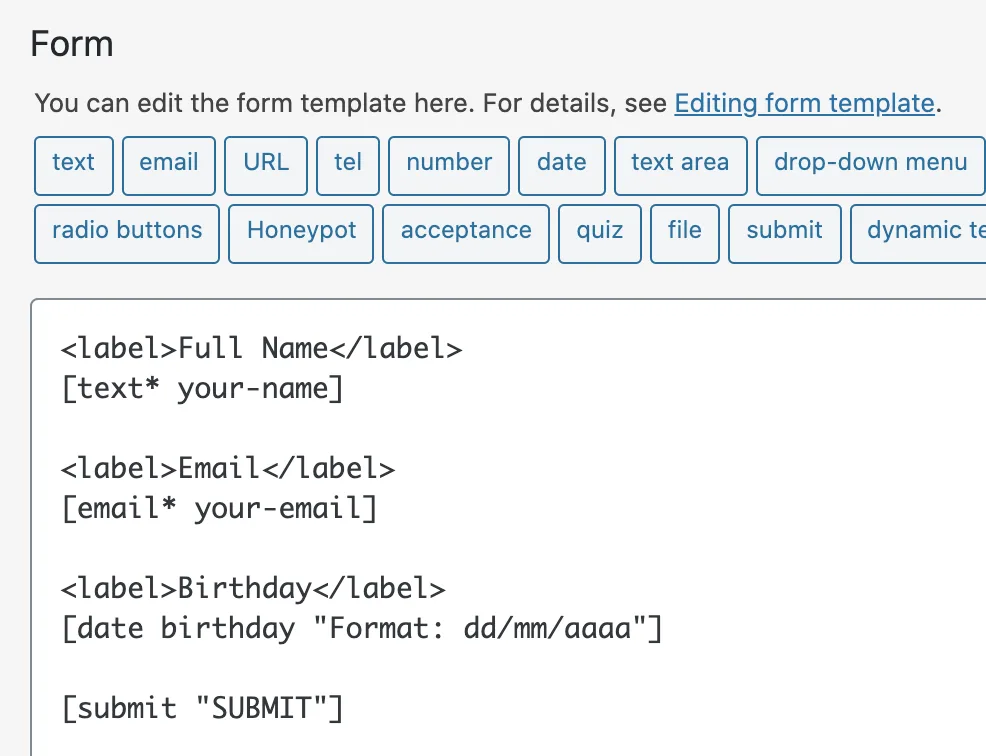
Furthermore, the date tag generates a date picker that visitors can use to select their birthday. The tag name (for instance [date your-birthday]) becomes the mail-tag you will map in the next step.
Step 2: Preview the Rendered Form
After adding the date field, save your form and preview the page. The birthday field renders as a standard date input. Specifically, it looks like this on the front end:
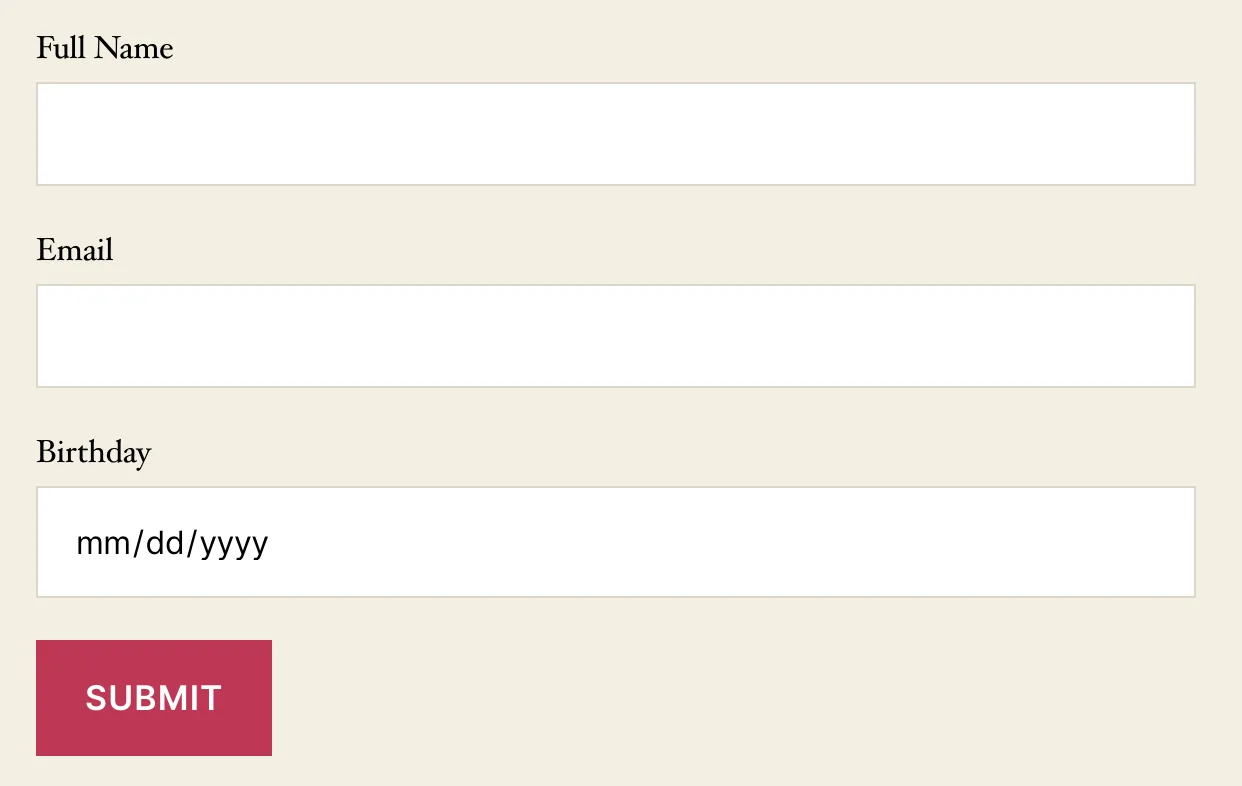
In short, visitors see a clean date picker. The format they enter does not matter at this stage — Chimpmatic handles the conversion to Mailchimp’s expected format.
Step 3: Map the Birthday Field in Chimpmatic
Open the Chimpmatic tab in your CF7 form editor. In the Custom Fields section, map your CF7 birthday mail-tag to the Mailchimp BIRTHDAY or MMERGE3 merge tag. For example, you can configure the mapping like this:
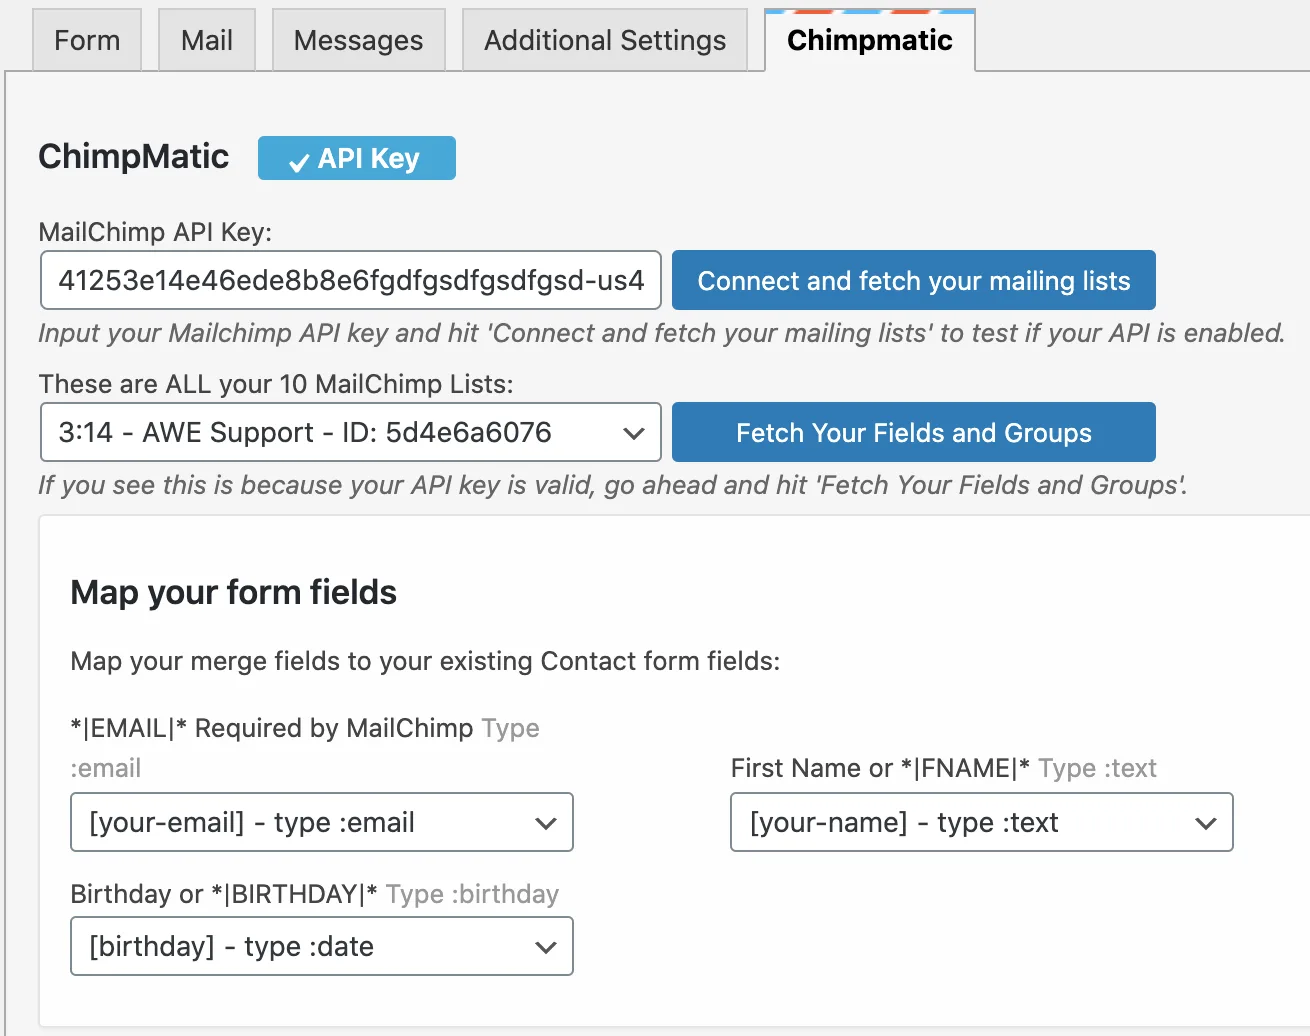
Moreover, make sure the merge tag name matches exactly what appears in your Mailchimp Audience field settings. Consequently, if your birthday field uses a custom merge tag like BDAY, use that tag in the mapping instead.
Step 4: Verify the Mailchimp Birthday Field Data
After submitting a test entry through your form, open the subscriber’s profile in Mailchimp. If all is set correctly following the above steps, you can see the Mailchimp birthday field populated in the subscriber’s profile:

As a result, the birthday value appears in the subscriber’s profile under the merge field you mapped. Additionally, this data is now available for automations and segmentation.
Troubleshooting Date Format Mismatches
The most common issue with the Mailchimp birthday field is a format mismatch. In particular, Contact Form 7’s date field sends dates in YYYY-MM-DD format by default, but Mailchimp expects MM/DD or DD/MM.
However, Chimpmatic handles this conversion automatically. If you are still seeing errors, check the following:
- Verify the merge tag name. Make sure the tag in Chimpmatic matches the tag in Mailchimp exactly — including capitalization.
- Check the birthday format setting. Open Mailchimp > Audience > Settings > Audience fields and confirm whether your birthday field uses MM/DD or DD/MM.
- Test with a real submission. Specifically, submit a test form and check the Mailchimp subscriber profile within a few minutes.
Using Birthday Data for Automated Emails
Once the Mailchimp birthday field is populated, you can create automated birthday email campaigns. In Mailchimp, navigate to Automations > Classic Automations > Celebrate a birthday. Mailchimp sends the email automatically every year on the subscriber’s birthday.
For more advanced automation workflows using Contact Form 7 and Mailchimp — for instance, triggering a welcome sequence with a birthday coupon — see the CF7 Mailchimp Automation Guide.
Next Steps
- Mailchimp Default Audience Fields Explained — understand all default merge tags including birthday.
- Connect Contact Form 7 to Mailchimp — full setup guide if you are starting from scratch.
- Mailchimp merge tags documentation — official reference for all merge tag formats.
For the broader CF7 → Mailchimp setup, see Chimpmatic for CF7 → Mailchimp.